Showing posts with label THURSDIY. Show all posts

Thursday, August 16, 2012

THURSDIY: Tea Dying

Tea - Dying!
The school years approaching which means it's time to get my little craft shop off of the ground. For years now I've been crocheting by commission or for birthday gifts, but I've been inspired to create my own shop to sell my crocheted and knitted goods. More to come on that later!  For this DIY I decided to tea-dye tags which I will be using to label the items in my shop, it's super easy, but takes some time!

Supplies
Tags (or paper)
Black tea
Small pot
Water

Step 1:
Take a pot and fill it with water.
Step 2:
First bring pot to a boil and put back on low heat.
Pick any black tea. I'm using Irish Breakfast Tea (Which is my favorite, but I accidentally got the decaffeinated kind, so I've got tea bags to spare!) 

Step 3:
Add the tags (or paper) to the pot. I put a fork over top of the tags so they would stay submerged in the tea and gain more color. Leave in the pot for about 20 mins.
TIP: Check back frequently to see the development. If you don't want your tags to turn out too dark, simply take it out sooner. If you want your tags to be dark, let them sit for longer.

Step 4:
When your tags are the desired cover, set them out to try. It takes a few hours for the tags to get completely dry.

  And you're done! The tag on the left is the finished product while the tag on the right is the original tag. I wanted the tags to only be slightly stained to give each tag an individual vintage look. Since all of my crafts are one of a kind and handmade, I believe I should also take the time to create one of a kind hand made tags. This DIY is super simple!

~ Bunny

Thursday, August 9, 2012

THURSDIY: Pillow Bow

THURSDIY: Pillow Bows/ Pillow Accents
This is a fun, easy and relatively fast way to bring some color to basic pillows, and to bring color to any room.

Supplies
1. Scissors
2. Fleece (or any fabric of your choice)
3. Safety Pins (two per bow)

Step 1
Cut the fabric into two large rectangles and two skinnier rectangles. The exact size does not matter, as long as they look relatively the same. See picture below for example.
Step 2
Take one of the larger rectangles and fold the longer edge inwards. This helps to hide the cut and uneven edges of your bow. When using fleece, just press down on the sides of the fabric and it should stay down.

Step 3
This time, take the two shorter edges and fold them inwards so they will fold on top of the longer side edges. 
Step 4
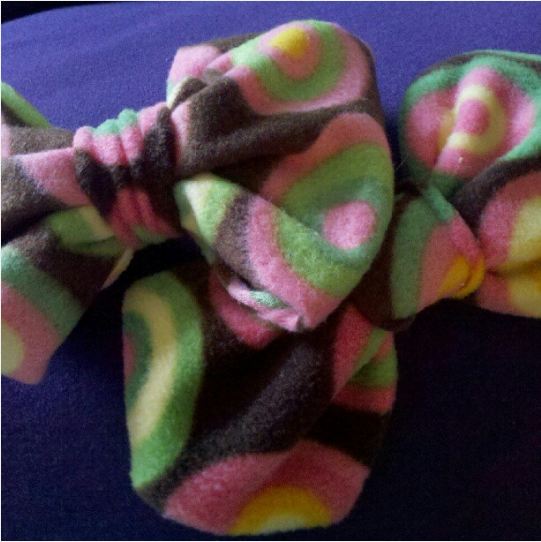
Now just squeeze the middle of the fabric so that it starts to get its bow shape. If any of the creases come undone, just refold them.
Step 5
Take each corner of the bow and fold them towards the middle of the bow that you created. Again, press down on the fabric to that it maintains its shape and that the edges stay in place.
Step 6
Now just take the thinner piece of fabric and place it under the bow shape that you have created.
Step Seven
My favorite part! Take the thinner piece of fabric and tie it around the bow shape so that all corners are tucked inside the knot. Remember to pull tightly so that the fabric is secure, but if it comes undone it's very easy to just stick the corners inside of the knot.

Step 8
Using the safety pins, place them wherever you want on the side of the bow that will not be seen. From my experience, it helps to have both safety pins on the outside of the knot on each side. This helps to keep the bow secure wherever you decide to place it.
All done!
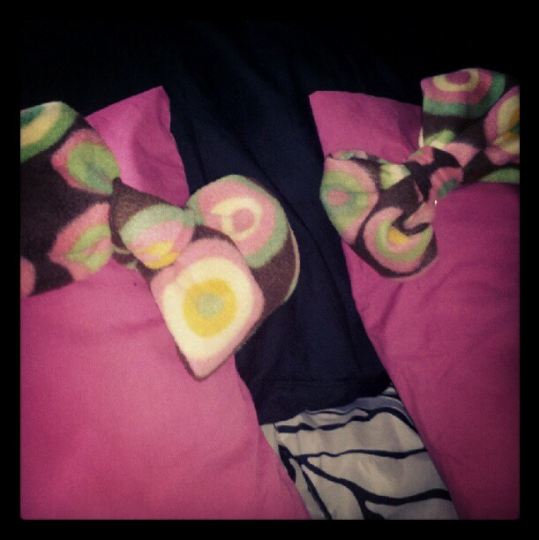
Place the bow wherever you would like. I decided to put it on my pillows because they were just so...plain to me. Plus, I didn't want to spend a bunch of money on getting new pillow shams or pillows when I had fabric available. I'd love to see where you place your bows!
~ Bunny

Thursday, August 2, 2012

THURSDIY: Upcycled Memory Box

Have any scraps of wrapping paper never used? Empty shoeboxes? What about cut up pieces of origami paper? Colorful newspaper? This project is for you. We'll be upcycling all of these items to create a memory box for anything you want!

This project is great for creative, colorful storage ideas and is a fun way to pass the time while watching the Olympics or one of your favorite films.

 Supplies
Shoebox (old or new)
Scraps of wrapping/origami paper
ModPodge
Scissors
Paintbrush
Newspaper
Clear Tape
Packaging Tape (optional)
Business Cars, String (optional)

 Step One: Cut the newspaper into four different sections, it really helps if you cut using the folds (sizing is the most appropriate).

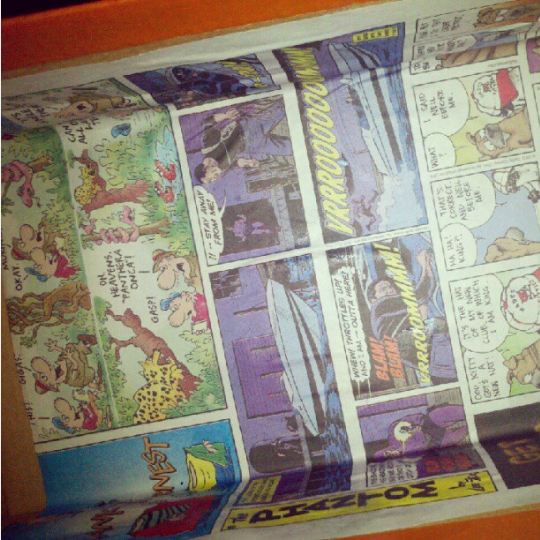
 Step Two: Size the newspaper for the shoebox you're using and with modpodge, carefully brush on the glue and place the newspaper inside of the shoebox so that the edges are tight. Continue to add newspaper until all of the sides are covered.

If you want a more glossy, durable inside, after lining the inside of the shoebox, carefully pull long strips of packaging tape to cover the inside of the box. Don't worry about the tape showing on the outside because we'll be covering it up!

NOTE: This step is optional.

 Step Three: Adding the scraps of origami/wrapping paper. Starting with the lid, cover the sides of the shoebox first, make sure the strips you are using are long enough to wrap around the lip of the box and tape (or mod podge) the strips around the box.

NOTE: When covering the body of the box, you'll want to use the same method. Make long enough strips so that the paper can comfortably go around the lip of the box and on the bottom of the box. Be sure to keep the paper tight so that the box will be able to close.
 Step Four: Cover the top lid of the box with one large strip, make sure to pull tight to make a glossy, simple look.

 Step Five: Refer to Step Three in order to cover the body of the box.

For the box in the picture, I decided to create triangles on the side of the box to give it a different look from the lid. I ended up really liking the results!

The Finished Project. This is a fun and easy DIY that gives a little fun to your small storage collection. Ideally, this would be perfect for small yarn storage, letters, or small books, photographs and news articles, but of course you can put in whatever you'd like!