Saturday, September 8, 2012

THURSDIY: Canvas Art!


Our living room walls were looking pretty scarce for awhile and we finally got our acts together and decorated them! We went through several ideas for the walls. At one point we wanted to put up posters that represented us, but it just didn't work out. We finally decided making custom canvas art. My idea was the quote painted over newspaper while Phaedra's idea was the melted crayon art. So, in a way we ended up doing exactly what we hoped to do with the space. Creating both are super simple there are millions of tutorials about them online.


All it requires to make this is a canvas, newspaper, some sort of adhesive (hot glue or mod podge work best), and paint. The hardest part of this was choosing neutral newspaper clippings to use for the background, but I managed. I snagged this idea from one of my favorite blogs A Beautiful Mess. I chose the sentence "Revel in it" partly because "revel" is my favorite word and partly because the phrase promotes just being foot loose and fancy free, two things I don't do enough of.


Crayon canvas art is so much fun and so easy to make. All you need is a pack of crayons (Note they have to be crayola and we suggest getting the 64 pac) hair dryer, and a canvas. First you you hot glue the crayons on the canvas in whichever way you want, some people get fancy and glue them in shapes. Let the the crayons dry you take your hair dryer and hold it over your crayons until they start to melt. Some girls bleed faster than others, your reds will go pretty quickly. If that happens just move the blow dryer over the areas that aren't going as quickly. You can blow the melting wax around to blend colors and create a pattern. Be careful not hold it under the blow dryer for too long or else some of your colors will start thin out or blend into brown. 


Our living room feels so much more complete now! Happy creating :)

~Turtle & Bunny


Thursday, September 6, 2012

WENSDOM: Staying connected to campus

(One of my favorite walkways on campus.)

Moving off campus brings on a lot of changes, some pretty obvious like having to budget time for cooking and being respectful to neighbors. Amongst the obvious changes come quite a few I didn't consider namely staying connected to the comforts of my campus. The luxuries of having a postal service nearly a yard away, easy accessible meals, more free time in between classes, and most importantly my friends at an arms reach. I'm a pretty sociable person, so I'd like to think. Last semester I lived in a dorm that housed my core friends while I'd see the bulk of my friends in the dining hall for meals or around campus as I hung out during the day. When I started school last week the first thing I realized was how quickly the distance of my new apartment could drive a wedge into my friendships and social life if I wasn't careful.

In efforts to prevent this I had to create systems that blended the old ways I interacted with my friends with the much needed new. Every day I eat at least one meal in the dining hall, normally lunch. I try to sit with different groups and really spread my time evenly. I visit my old dorm weekly to catch up with the lovely folks I left behind there. I don't hesitate to invite people over to the apartment, nor do I use the distance of my apartment as an excuse as to why I can't participate in something...no matter how tempting. I also have figured out that including my friends as much as possible in my new change helps keep them close. I keep them updated on apartment happenings that are funny or silly through texts and photo messages. Pics of my cat are always crowd favorites. In addition to joining my friends for lunch I initiate grabbing meals out around town and hanging out in other ways off campus.

Even though all these new systems of keeping up with people are great I still reserve some good old traditions. Every Saturday I have make sure to have brunch at noon with friends, I bask in the sun on my friends couch in her dorm when I need to think things over or pass time, I read in the Lit House in between classes, and nothing will ever beat just walking around my beautiful campus talking with someone.

~Turtle

Tuesday, September 4, 2012

Taste Test: Stewed Chicken


I watched my mom prepare this meal one night over the summer and was shocked to see how easy it was, yet how gourmet it looks. If you like chicken and want to impress people with your cooking skills I'd whip this up. 


What you need: chicken breasts (enough for however many people you're feeding), a can of stewed tomatoes, four different color peppers, and a dish to put it all in. You'll also need to budget about an hour and a half for this meal's preparation and cooking time.


Step one: Season your chicken. I used garlic powder, season all, and poultry seasoning. Don't be stingy either, it's okay to get a little heavy handed when applying them. 

Step two: Place the chicken in the oven to bake on 375 for 30 minutes. 


Find something constructive to do while you wait but hang around the kitchen to check up on it. 


Step three: When there's about five minutes left for the chicken cut up your peppers. 


Step four: Combine the stewed tomatoes and the peppers with the chicken. 

Step five: Place the dish back in the oven for additional 30 minuets.


And you wait some more...


And voila! You may want to serve it with rice to add a little something else to it. Easy isn't it! It'll be a hit whether you're just looking for a colorful dish to try or perhaps trying to impress that special someone. For a vegetarian spin kick out the chicken and add beans. Enjoy!

~Turtle


Monday, September 3, 2012

Heading back to school with a bang!

(Our kitchen chalkboard is a crowd favorite. Loved waking up to all these silly notes.)

To kick off the beginning of the fall semester, Phaedra and I threw a back to school party. Marking it the first major bash our little apartment experienced. Despite a few chaotic moments, the night was amazing and whether good or bad it was definitely one to remember. I blame the hard lemonade recipe a friend gave us. I was surprised at how in order the apartment was post party. I think cleaning as the party is in flow keeps the workload for post night much smaller. We had out clearly visible places for our guests to dispose of their trash as they saw fit, that helped tremendously.

(Phaedra and I on our balcony.)

We also put a drink cap on for the night so at one point we weren't having to worry ourselves with constantly cleaning. In addition to the drink cap keeping down on trash it also keep down on things getting to out of hand. Before the party even got started by way of enforcing a cap we encouraged BYOB. You never want to wakeup to find $40 dollars worth of alcohol down the drain in one night.

 (Jacki, me, and Em in my room.)

 (The much missed Mike who's finally returned from studying abroad and Phaedra.)

(What too much fun looks like.)

Since we live off campus now we don't live with a major friend group anymore and with our differing schedules during the week it's hard to see one another so the party was a great place to catch up. We had a good time and most importantly all of our attendees did too.

~Turtle & Bunny!

Tuesday, August 21, 2012

Oh the anticipation!

(Sinatra lounges on my bed when I'm gone.)

With the start of the semester this coming Monday, Phaedra and we can barely contain our excitement and anticipation for what's to come! We can't wait to see our friends, start classes, and we both will be starting new jobs this semester as well. Before we can get to all of that we both have to survive this week. We are frightfully busy this week. By the time we get home the last thing on our mind is updating our blog and we apologize for that. Don't worry this won't become a habit. Curious as to what has kept us away? Well, I started training for my section editor position of my school's newspaper. It's been a lot of fun. I'm feeling pretty good about the whole thing. While I'm mastering programs like photoshop and Indesign, Phaedra has been training and preparing for her new position as a peer mentor. We both start our days around 8am and end our days around 8pm.

In the morning we both wakeup, she puts on a pot of tea, while I make coffee and moan and complain over what to wear. Then we return to end up talking for nearly three hours about our days. It's been blissful. More to come very soon!

~Turtle

P.S. expect a lot of exciting changes around here!

Sunday, August 19, 2012

SATURDAY DIME: Party Planning!


(Our friends Reanna, Brittni, and Jacki at Brittni's 21st party.)

It's official! Phaedra and I are officially living at our apartment full time now. Upon settling in and putting those finish decorating touches in certain rooms, we had to stop and plan one of the most important functions of our apartment...PARTIES! Now, we love themed parties, and our friends really do too...or they at least humor us and go along with it. So, we sat down and comprised a list of ten ideas we hope to execute over the course of the school year.
  1. Back to School/Open Apartment: The weekend of every semester is always a lot of fun, so we figured we'd start the year off with an awesome back to school get together. And to show off the new digs to our friends.
  2. Halloween Costume Party: I'll take any excuse to be in a costume!
  3. Black Dress party: Little black dress parties always seem so sexy and classy. 
  4. Murder Mystery: Phaedra is a pro at these and we have a lot of friends who would be way into playing a character all night. 
  5. A mustache party: We want to throw a party that is so hipstery it's ridiculous, just for kicks! 
  6. Moving drinking game party: Nothing can top sitting around watching an old comedy or bad horror film and drinking along to it. It's so much to yell at the screen together, laugh, and just be merry! 
  7. Board game party: Sometimes just staying in popping open wine and playing a board game does the trick.
  8. Drinking game party: Basically you take birthday party ice breaker games and add beer. 
  9. Arts and crafts party: Who doesn't love sitting around making fabric flowers and friendship bracelets?! 
  10. Christmas party: It'll be nice to end the semester with a fun Christmas party!
Can't to start posting as we plan!  


~Turtle 

Thursday, August 16, 2012

THURSDIY: Tea Dying

Tea - Dying!
The school years approaching which means it's time to get my little craft shop off of the ground. For years now I've been crocheting by commission or for birthday gifts, but I've been inspired to create my own shop to sell my crocheted and knitted goods. More to come on that later!  For this DIY I decided to tea-dye tags which I will be using to label the items in my shop, it's super easy, but takes some time!

Supplies
Tags (or paper)
Black tea
Small pot
Water

Step 1:
Take a pot and fill it with water.
Step 2:
First bring pot to a boil and put back on low heat.
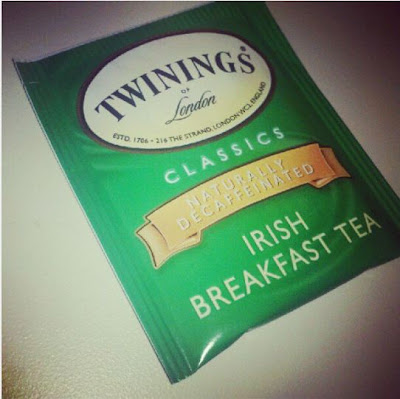
Pick any black tea. I'm using Irish Breakfast Tea (Which is my favorite, but I accidentally got the decaffeinated kind, so I've got tea bags to spare!) 

Step 3:
Add the tags (or paper) to the pot. I put a fork over top of the tags so they would stay submerged in the tea and gain more color. Leave in the pot for about 20 mins.
TIP: Check back frequently to see the development. If you don't want your tags to turn out too dark, simply take it out sooner. If you want your tags to be dark, let them sit for longer.

Step 4:
When your tags are the desired cover, set them out to try. It takes a few hours for the tags to get completely dry.

  And you're done! The tag on the left is the finished product while the tag on the right is the original tag. I wanted the tags to only be slightly stained to give each tag an individual vintage look. Since all of my crafts are one of a kind and handmade, I believe I should also take the time to create one of a kind hand made tags. This DIY is super simple!

~ Bunny

Wednesday, August 15, 2012

WENSDOM: Envisioning your life


Have you ever heard of those people who write themselves a check for a million dollars and promise themselves that one day they'll cash it? Or someone who hangs a picture up of a house in their studio apartment with the goal of one day owning it? Well, no matter what the goal or vision, they all achieved it or made the dream a reality.  It's one thing to set goals for yourself, it's another to create a tangible reminder and force yourself to look at it daily. Much to my mother's insistence, I finally sat down and put together a vision board for myself. Unlike the million dollar check or the house dream, my dreams are much more abstract than that. I don't simply wish to one day be a millionaire or own a house, not that I wouldn't mind if such happenings where find their way into my life, but I have lots of goals and hopes and aspirations so a vision board was the best way for me to showcase what I hope for myself.


It was so rewarding putting the finishing touches on that board. It felt like a huge step in the right direction. Something about clearly stating what is you hope to achieve and do with your life that gives yourself a sense a purpose. I think a lot of young people today fall victim to apathy and the unwillingness to sit down and really envision things for their lives. I don't mean things like getting married, I mean career goals or lifetime achievement goals. I'd say think of something that doesn't necessarily involve someone else (relationship wise) to achieve, like wanting to stand on Mt. Kilimanjaro, or shaking hands with a king. For me, one of my major hopes is to always work in a career field that allows me to express myself creatively through writing, fashion, and photography. If you're wadding through your young adulthood like a zombie maybe you should sit down put together a vision board for yourself too.


Making a vision board is really simple. It's narrowing down what your vision is that can be the challenge. I pulled from my inspirations first, like Josephine Baker because she became an adoptive mother of twelve due to childbearing complications and I to want to become an adoptive mother. Or Andy Warhol, because he didn't just prosper in one career field he led many different careers and I also have huge ambitions to do many different things. I then started pulling from huge reaching for the stars goals, like the magazine clipping. It's a clipping from my favorite magazine column which I have dreams of one day writing for. I also pulled from not just career goals but personal life goals. The word "beyoutiful" is something I have to tell myself on my journey of self confidence. The photograph of the map represents my desire to want to travel and see the world and connect with people of different cultures. 


Armed with my vision board and my goals clearly stated I plan to never sell myself short and never to lose sight of them.  

~Turtle


Tuesday, August 14, 2012

TASTE TEST: Egg sandwich


This is a quick and easy breakfast meal that can be made in a variety of ways. It can made on toast, a biscuit, or like I'm going to show you today, a bagel. All you need is a bagel of your choice, I was recently turned on to the thinly sliced bagels. They're a lot more forgiving in the calorie department and a better value than the standard size because so many come in a pack. Meat of your choice, I've chosen pork sausage patties, because patties make placing on a sandwich a lot easier. And then two eggs and shredded cheese.


First, you'll want to cook your meat in the skillet. Once the meat is prepared move it aside and then scramble your eggs. As the eggs start to cook, add a pinch of salt and pepper before sprinkling a handful of shredded cheese. Then scramble them up. I really like to scramble them hard when it comes to making a sandwich, some people like them a little runny. Move the eggs aside once they're cooked, they tend to cook really fast. Pop your thin bagel in the toaster, on a much lower setting than you would a normal bagel. 


Once the toast is ready, spread some butter and then combine everything, eggs on the first followed by the sausage. 


Then, enjoy! 

~Turtle


Monday, August 13, 2012

Slam poetry and me

I remember the first day I ever heard slam performed. A slam poet came into my fifth grade class and performed a poem about her mother's kitchen. She was a tall gorgeous young black woman with a polished afro, wooden bangles that danced when she talked, huge hoop earrings, and this awesome baggy sweater that I still remember years later. She helped my class write poems that we then had to perform. It was so much fun, I wrote about my grandma who had recently passed away. From that day forward slam poetry had a strong place in my heart. Everything about slam poetry entices me. Even it's name slam poetry...like you're slam dunking your thoughts. Or it's other name spoken word. I had never heard poetry to sound and move like music before. Not like that anyway. As I got older I put all notions of poetry on the back burner until recently. I started writing my own poetry again last semester. I'd write them by hand in my journal first and then edit them on my computer until they were perfect! I think some of them are even ready to go to slams! Our school has open mike nights in which anything can be performed...I think I'm going to talk myself into going. Before I really started taking my attempts at writing slam seriously I studied. The thing with slam is that it's powerful when you read it, but it's the performance by the original author that really harnesses the power with every word. You can't just stand there and just read your slam poetry, you have to perform it, preach it, declare it! It's often angry, but I've found enough examples of all emotions and genres. Maybe my love of slam is why I love rap music so much too. They're very similar!

Here are some of my favorite slam poets and their poems:

Sarah Kay, "If I Should Have a Daughter."

One of my favorite poems in general! (Her name has nothing to do with it :p)


Jeanann Verlee, "40 Love Letters."

This poem is just...glorious! 


Nicole Homer, "When your boyfriend asks." 

Such a great message on no selling yourself short.


I could go on and on! Hopefully these will lead you to others like they've done for me, enjoy! 

~Turtle


Sunday, August 12, 2012

SATURDAY DIME: Why We Love Ikea


1. The prices aren't ridiculous. You can get a bed frame, mattress, and slats for under $500. Also their cookware and dishes are a VERY good quality and price.

2. The store is super user-friendly. You can just pull bed frames off the shelves and be confident that it's the right product in the right place.

3. The merchandise in the store changes within a season so there's always something new to find. Every time you go back, there's bound to be something new.

4.The staff is knowledgeable and friendly. Plus they actually know where items are, which is especially helpful for first-time visitors. (Ikea can be a bit of a maze)

5. Everything is basic and simple so your personal style can shine through. Kind of like the American Apparel of furniture and home goods.

6. Their product's last! (Kay has a table and chair set for kids that she's had and it's still being used by her little cousin in North Carolina!) 

7. It's a DIY playground. You can take everything there and make it yourself and personalize it any way you want.

8. You can drop your kids off! (This is super helpful when my sister wants to go but doesn't want her children touching everything)

9. It's clean. It's not like one of those furniture stores with crushed cheeze-its in the bunk bed section where the last child was hanging out. It's a really well put together place.

10. They serve food. Who doesn't get hungry while shopping? Plus you won't break the bank if you come with a family. (The meatballs and lingonberry juices are the best.)

~ Bunny & Turtle

PETFO: Perry is getting a new home!


It is time! As much I don't want to have to...Perry has to be moved into a glass enclosure since it has a lid. Before the harsh tortoise critics start throwing their tomatoes at me, I do have good reason! My cat has finally realized Perry is in his bin and last night I found him inside the bin eyeing him. That's just too close for comfort, so for Perry's safety I'm putting him in a glass terrarium. I'm not sure what Sinatra's intentions were...he was just checking him out most likely but to keep the peace and give me some peace of mind Perry is getting a new home. I'll post an update post all about how to safely move your tortoise to a new home and how to make them as comfortable as possible in the new setting.  

~Turtle

FANCY FRIDAY: Sunday Best


I love this sundress I found in my mom's closet! She'd had it forever apparently. It's a little loose on me so I decided to belt it, but I just adore the chiffon and the floral print. I really fell in love with it because it has that loose shapeless cut that was popular in the late 90's! I paired it with these brown oxford heels I got earlier this week, I need to break them in! (Thanks mom for the photography!)

~Turtle


Thursday, August 9, 2012

THURSDIY: Pillow Bow

THURSDIY: Pillow Bows/ Pillow Accents
This is a fun, easy and relatively fast way to bring some color to basic pillows, and to bring color to any room.

Supplies
1. Scissors
2. Fleece (or any fabric of your choice)
3. Safety Pins (two per bow)

Step 1
Cut the fabric into two large rectangles and two skinnier rectangles. The exact size does not matter, as long as they look relatively the same. See picture below for example.
Step 2
Take one of the larger rectangles and fold the longer edge inwards. This helps to hide the cut and uneven edges of your bow. When using fleece, just press down on the sides of the fabric and it should stay down.

Step 3
This time, take the two shorter edges and fold them inwards so they will fold on top of the longer side edges. 
Step 4
Now just squeeze the middle of the fabric so that it starts to get its bow shape. If any of the creases come undone, just refold them.
Step 5
Take each corner of the bow and fold them towards the middle of the bow that you created. Again, press down on the fabric to that it maintains its shape and that the edges stay in place.
Step 6
Now just take the thinner piece of fabric and place it under the bow shape that you have created.
Step Seven
My favorite part! Take the thinner piece of fabric and tie it around the bow shape so that all corners are tucked inside the knot. Remember to pull tightly so that the fabric is secure, but if it comes undone it's very easy to just stick the corners inside of the knot.

Step 8
Using the safety pins, place them wherever you want on the side of the bow that will not be seen. From my experience, it helps to have both safety pins on the outside of the knot on each side. This helps to keep the bow secure wherever you decide to place it.
All done!
Place the bow wherever you would like. I decided to put it on my pillows because they were just so...plain to me. Plus, I didn't want to spend a bunch of money on getting new pillow shams or pillows when I had fabric available. I'd love to see where you place your bows!
~ Bunny